


Table of contents

No headings in the article.
If you are comfortable with python language and looking to get into web development, Django is a perfect choice. In this tutorial, you will learn the fundamentals of Django programming by building a simple to-do list.
What is Django?
Django is a high-level Python web framework that encourages rapid development and clean, pragmatic design. Although it uses slightly different terminology, Django adheres to the MVC(Model-View-Controller) pattern closely. In its most basic form, Django is an MTV (Model-Template-View) framework. Django refers to Views as Templates and Controllers as Views. As a result, the Python code will be in views and models, while the HTML code will be in templates. Instagram and Pinterest are examples of big companies already running on Django.
Why Django?
- Fast. Django was developed to reduce the time developers took applications from concept to completion.
- Secure. Django is serious about security and aids developers in avoiding many frequent security pitfalls.
- Scalable. Some of the high-traffic websites developed using Django. Django can swiftly and adaptably scale the website to handle even the highest traffic demands.
Prerequisites
- An understanding of python.
- Python. To download, click here
- A code editor
- Unix-based operating system -An understanding of HTML
Setting up the development environment
A Django application should be developed and run in a separate environment. By creating a separate Python environment, you avoid installing Python packages on a global scale. First, create a new directory where your app will be stored.
mkdir folder_name
cd folder_name
(You can change folder_name to what you choose to name your folder). While inside folder_name, install virtualenv using Python installer *pip. Virtualenv is a tool for creating isolated virtual python environments.
pip install virtualenv
After the installation is complete, create a virtual environment.
virtualenv venv
Note that you can change the name venv to your preferred name. To activate, run the code below:
source venv/bin/activate
 Now that the virtual environment is activated, you can create a Django project.
Install Django
To install Django, use the following command:
pip install django
Start a Django project
Now that we have Django installed, the next step is to create a project.
django-admin startproject myproject
The project's name is myproject. You can change it to your preferred name.
Project structure
When a Django Project is created, it includes some basic files by default, such as manage.py. To better understand its structure, here is what myproject looks like:
.
├── manage.py
└── myproject
    ├── asgi.py
    ├── __init__.py
    ├── settings.py
    ├── urls.py
    └── wsgi.py
The above files are:
manage.py - A command-line utility that allows you to interact with this Django project in a variety of ways.
init.py - An empty file that instructs Python that this directory should be treated as a Python package.
settings.py - This file contains all the website settings. Here, you can register applications you create, configure databases, etc.
urls.py - This file stores all links to the project.
asgi.py and wsgi.py are advanced at this point. Here is a basic definition.
asgi.py - An entry-point for ASGI-compatible web servers to serve your project.
wsgi.py - This file is required for the WSGI deployment of the project. It is used to facilitate communication between your Django application and the web server.
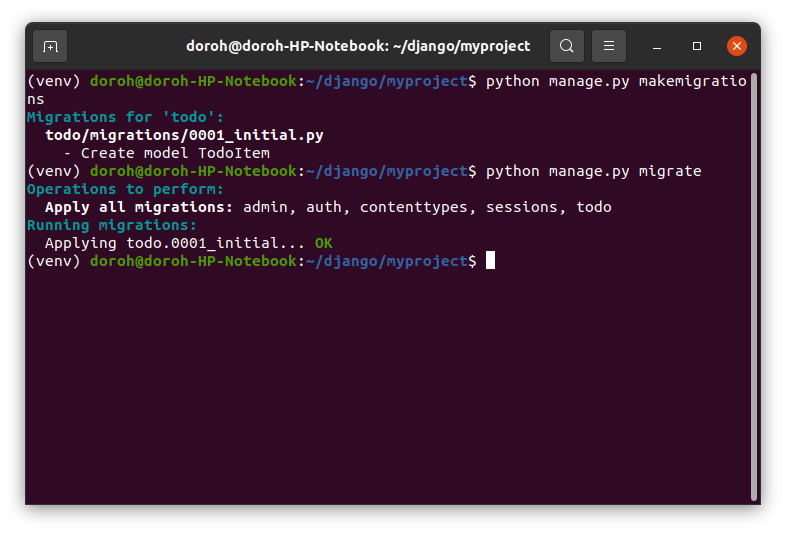
Making migrations
Migrations are Django’s way of propagating changes you make to your models (adding a field, deleting a model, etc.) into your database schema. First, change the directory to where the project is. Make sure it has a manage.py file in it.
cd myproject
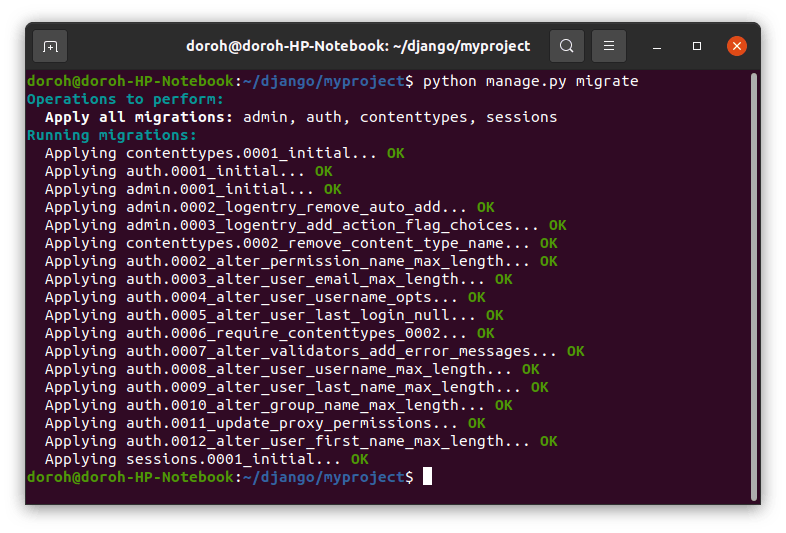
To make migrations:
python manage.py migrate
The command migrate applies and unapplies migrations in the database schema. Running the code above will give:
Running server
To confirm that everything works well, run the server.
python manage.py runserver
This gives the following output in the command line.
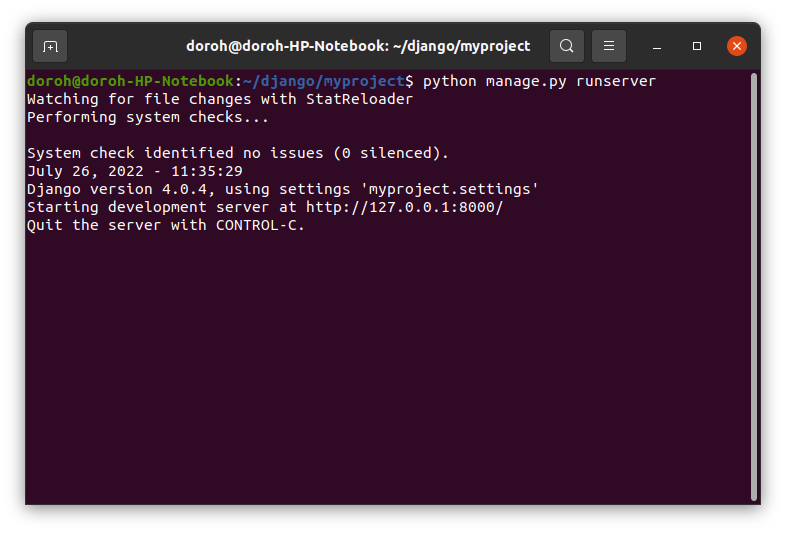
The server is live. Visit http://127.0.0.1:8000/ with your web browser.
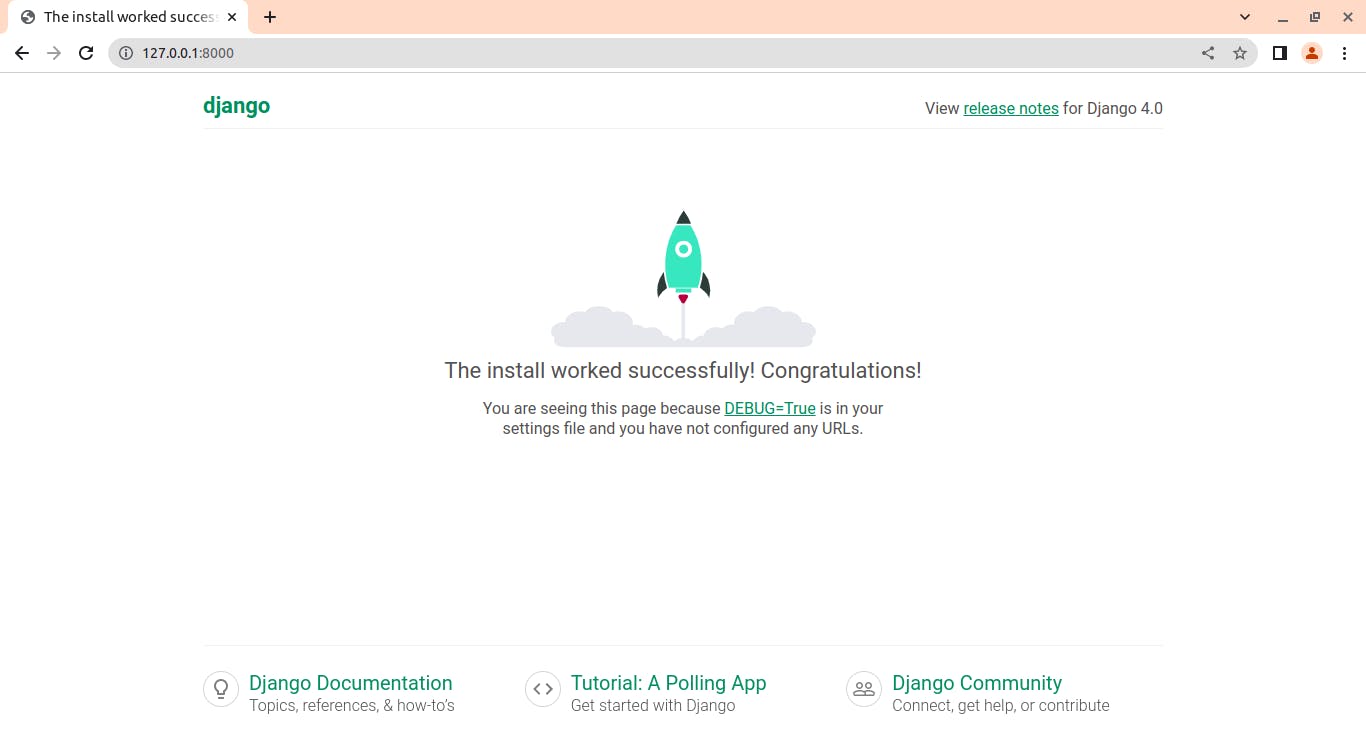
Congratulations. You have successfully created a Django project.
Creating a Django app
A Django application is a Python package that is specifically intended for a Django project. You can have many Django apps under one project. Each app created is an independent module. Let's create a simple to-do app.
python manage.py startapp todo
The to-do app directory is:
.
├── db.sqlite3
├── manage.py
├── myproject
└── todo
    ├── admin.py
    ├── apps.py
    ├── __init__.py
    ├── migrations
    │   └── __init__.py
    ├── models.py
    ├── tests.py
    └── views.py
models.py file contains the essential fields and behaviors of the data you're storing.
admin.py file is the command-line utility for administrative duties in Django.
views.py file contains Python functions that take HTTP requests and return HTTP response, like HTML documents.
Configure todo app
To include the app in your project, add your project name to the INSTALLED_APPS list. To achieve that, open the settings.py file in your code editor. Django automatically creates a list of apps it installs to the project.
INSTALLED_APPS = [
    'django.contrib.admin',
    'django.contrib.auth',
    'django.contrib.contenttypes',
    'django.contrib.sessions',
    'django.contrib.messages',
    'django.contrib.staticfiles',
    'todo' # new app
]
Defining models
A model is the single, definitive source of data information. It contains the data's essential fields and behaviors. Each model corresponds to a single database table. Django comes with SQLite configured out of the box as its database. Other databases, such as Postgres, can be used. Designing a good data model is a make or break for any app. Take your time to visualize what your app will look like. Your to-do list app should contain:
- A title
- When the task is created
Open models.py in the editor. At a glance, it just looks like this:
from django.db import models

# Create your models here.
Add the codes for your data models here.
from django.db import models

# Create your models here.

class TodoItem(models.Model):
    title = models.CharField(max_length=100)
    created = models.DateTimeField(auto_now_add = True)


    def __str__(self):
        return self.title
Great. You've defined one model class. The next step is to do the migrations by running two commands, makemigrations and migrate.
makemigrations separates out your model changes into separate migration files, which is like commits, and migrate applies them to your database.
python manage.py makemigrations
python manage.py migrate
Django admin interface
Now that you have created the data model and database, you need to add data to the models. Luckily, the Django admin site provides a quick way to create some test data.
A superuser can only access the Django admin interface. A superuser is someone who can access the whole Django server. To create one:
python manage.py createsuperuser
Follow the prompts and you should be a superuser.
You then need to tell the admin that TodoItem has an admin interface by registering the models in admin.py.
from django.contrib import admin
from .models import TodoItem
# Register your models here.

admin.site.register(TodoItem)
The admin interface app is ready. Make sure the server is running. On your browser, go to 127.0.0.1:8000/admin.
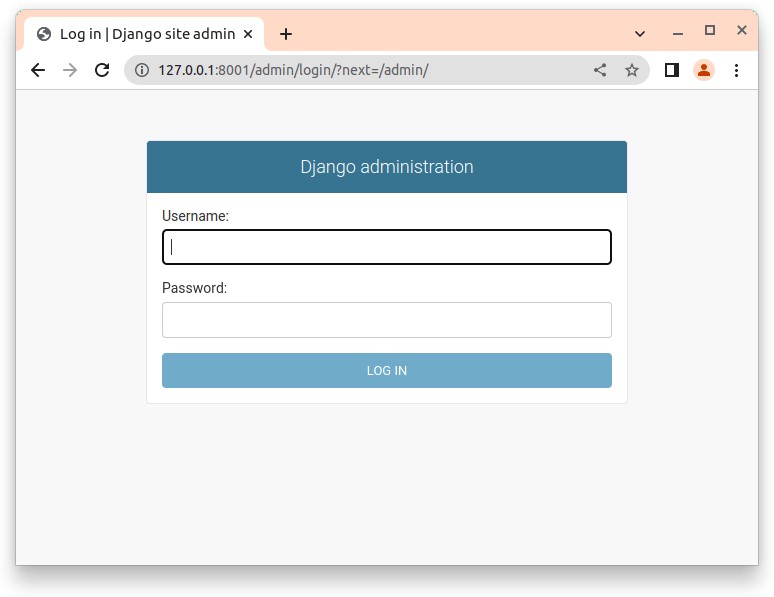
Fill in the username and password that you had set up earlier.
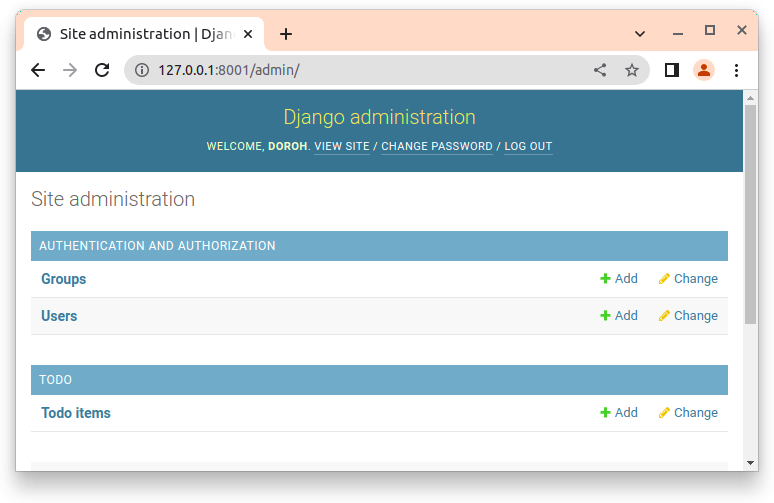
The admin interface has Todo items listed.
To create the first to-do item, click on add. This will give you an interface where you can add the title of the to-do item and save it.
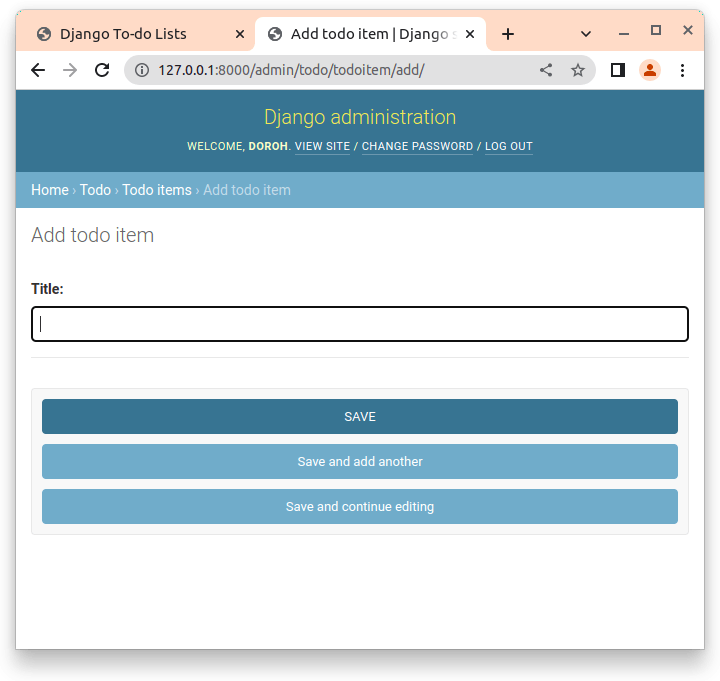
Create as many items as you can. You will use them in the testing process of the app interface.
Django views
Django views and templates are used to create the interface people will interact. You need to create a view function first, then pass the data to the template.
A view is a Python function that accepts a web request and delivers an appropriate web response. Anything that a web browser can show can be this response, including the HTML of a Web page, a redirect, a 404 error, an XML document, an image, etc.
Types of views
Views are implemented in two different ways:
- Using functions
- Using classes
Function-based views(FBV)
Function-based views are created by passing an HttpRequest object as a parameter to a Python function that produces a HttpResponse object. Function-based views are often classified into four fundamental techniques, namely, CRUD (Create, Retrieve, Update, Delete). CRUD is the foundation of any development framework. An example of FBV is:
from django.http import HttpResponse

# create a function
def home(request):

    return HttpResponse("<h1>Hello world</h1>")
First, you import class HttpResponse from django.http library.
Next, you define a function called home. Each view function accepts an HttpRequest object, commonly named request, as its first argument.
The created response is contained in a HttpResponse object that the view returns. Every view function must return a HttpResponse object.
Class based views (CBV)
Class-based views offer an alternate method for implementing views as Python objects rather than functions. They do not replace function-based views, but they have several differences and advantages when compared to them. An example is:
class MyCreateView(View):
  template_name = 'home.html'
  form_class = MyForm
where the template name is home.html
In this tutorial, you will use function-based views.
It is time to define your first view. Open views.py in your code editor and enter:
from django.shortcuts import render
from .models import TodoItem

# Create your views here.

def home(request):
    todo = TodoItem.objects.all()
    return render(request, 'home.html', { 'todo_list': todo })
Templates
A template contains both the static and dynamic portions of the desired HTML output. A template in Django is basically a .html file written in HTML, CSS, and JavaScript.
Create a template folder in the root directory, the same folder where manage.py is.
.
├── db.sqlite3
├── manage.py
├── myproject
├── templates
└── todo
Add this to settings.py.
TEMPLATES = [
    {
        'BACKEND': 'django.template.backends.django.DjangoTemplates',
        'DIRS': [BASE_DIR/'templates'], #here
        'APP_DIRS': True,
        'OPTIONS': {
            'context_processors': [
                'django.template.context_processors.debug',
                'django.template.context_processors.request',
                'django.contrib.auth.context_processors.auth',
                'django.contrib.messages.context_processors.messages',
            ],
        },
    },
]
The next thing is to create a base template that contains code you want to appear on every page. Other HTML files will inherit this template.
Create a base template
In the templates folder, create a new file and name it base.html
<!DOCTYPE html>
<html lang="en" dir="ltr">
  <head>
    <!-- Required meta tags -->
    <meta charset="utf-8">
    <meta name="viewport" content="width=device-width, initial-scale=1">
    <!--Simple.css-->
    <link rel="stylesheet" href="https://cdn.simplecss.org/simple.min.css">
    <title>Django To-do Lists</title>

  </head>
  <body>
    <div class="container">
    {% block content %}
          <!-- For each page, this text will be replaced with alternative html code. -->
    {% endblock %}
</div>

  </body>
</html>
A block is used to override certain elements of a template.
This means that you have a content block that is overridden by children who inherit from this template. You can achieve this by using the extends keyword in child templates.
Add a homepage template. In the same folder, create a new file and name it home.html
{% extends "base.html" %}
{% block content %}

{% if todo_list %}
<h3>Todo lists</h3>
{% endif %}

<div>
  {% for todo in todo_list %}
  <div style="padding:5px; margin-top:15px; border-width:0.5px;border-radius:15px; border-style:solid">
      <p >{{ todo.id }} . {{ todo.title }}</p>
      <p> <span style="color:green;">Created:</span> {{todo.created}}</p>

  </div>
  {% empty %}
  <h4>You have no lists!</h4
  {% endfor %}
</div>

{% endblock %}
The first line of the code means that you are extending base.html, everything in base.html will be rendered in home.html excluding code between {% block content %} and {% endblock %} tags.
The next bit of code is an if statement that returns the heading Todo list if there is a list of to-do items. The heading won't appear if the list is empty.
For loop is bracketed inside {% for todo in todo_list %} and {% endfor %} tags. {% empty %} tag lets you define what it should display when the list is empty.
{{ }} syntax is used to interpolate a variable that has been declared as one of the built-in options or your own that you have constructed using any number of methods (models, view context, etc.). In {{ todo.created }}, you’re rendering the created property of the loop variable todo_list.
URLs
Each view in Django must be associated with a URL pattern. This is accomplished using the URLConf Python package (URL configuration). Every URLConf module must include the variable urlpatterns, which is a collection of URL patterns that must be matched against the requested URL. These patterns will be examined in order until the first match is discovered. The view associated with the first match is then triggered. Django launches an appropriate error handling view if no URL pattern matches.
The urls.py file is inside myproject folder. Open it and enter the following code:
from django.contrib import admin
from django.urls import path
from todo import views

urlpatterns = [
    path('admin/', admin.site.urls),
    path('', views.home, name='home'),
]
The first path is auto-generated by Django. It renders the admin page. The second path is an empty path that tells Django to execute the home view.
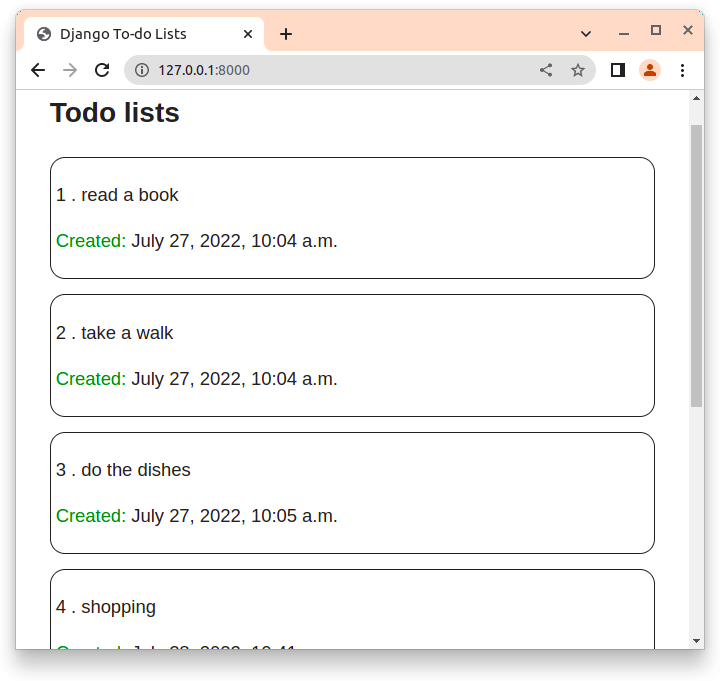
Run the server. Enter http://127.0.0.1:8000/ in your browser and the site will look like this:
Create tasks
So far, your Todo app looks good. But it lacks functionality. You can't add a task. Back to views.py. Define a function called add that takes a request as an argument.
def add(request):
    title = request.POST["title"]
    todo = TodoItem.objects.create(title=title)
    todo.save()
    return redirect("home")
request.POST is a dictionary-like object that lets you access submitted data by a key name. Here, request.POST['title'] returns the title as a string. TodoItem.objects.create creates a new title. todo.save() saves the newly created title to the dictionary. Finally, it returns you back to home.
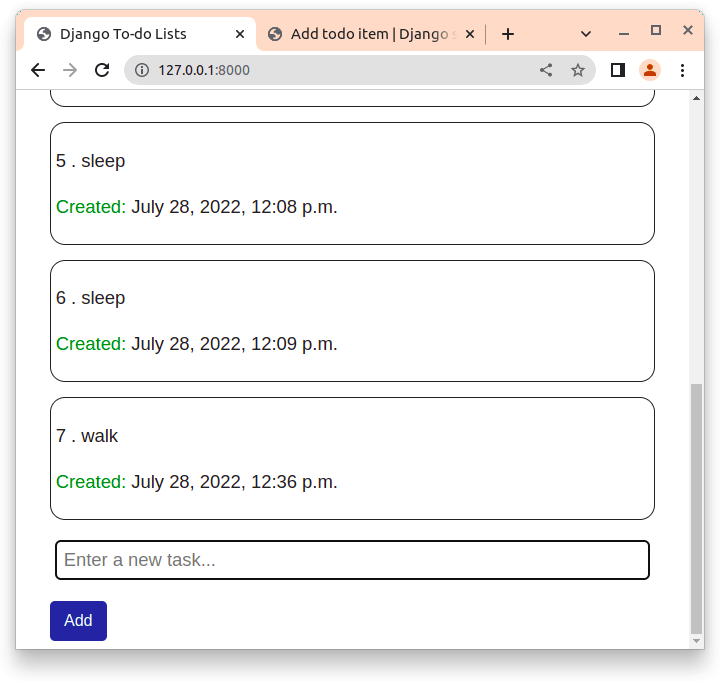
In home.html, add the following code right above {% endblock %} tag.
<form  action="/add" method="post">{% csrf_token %}
    <div style="padding:5px; margin-top:15px; " >

        <input type="text" name="title" placeholder="Enter a new task...">
        <br>
    </div>
    <button  type="submit">Add</button>
</form>
You've created a element that, when the user submits it, will generate a POST request with the user-updated form data as part of its content. The action attribute specifies where to send the form data when a form is submitted. {% csrf_token %} prevents malicious attacks by generating a secure token.
Create a route that connects it to add views. In urls.py, add this below the other path.
path('add', views.add, name='add'),
Delete tasks To delete the tasks, first, create a delete function in views.py.
def delete(request, todo_id):
    todo = TodoItem.objects.get(id=todo_id)
    todo.delete()
    return redirect("home")
Django's get() method returns a single object that matches the specified lookup parameter. The delete view gets todo_id as an argument, uses the id to locate the correct record, deletes that record and redirects the user back to the home view.
Updating the urls.py:
path('delete/<int:todo_id>/', views.delete, name='delete'),
This locates individual todo_id which are integers.
Finally, in home.html, make changes by adding one line of code:
<div>
  {% for todo in todo_list %}
  <div style="padding:5px; margin-top:15px; border-width:0.5px;border-radius:15px; border-style:solid">
      <p >{{ todo.id }} . {{ todo.title }}</p>
      <p> <span style="color:green;">Created:</span> {{todo.created}}</p>
<a class= "btn btn-secondary" href="/delete/{{ todo.id }}">delete</a> #new code for delete
  </div>
  {% empty %}
  <h4>You have no lists!</h4
  {% endfor %}
</div>
The tag defines a hyperlink, which is used to link from one page to another. href attribute contains a link that shows the link destination.
Reload your browser.
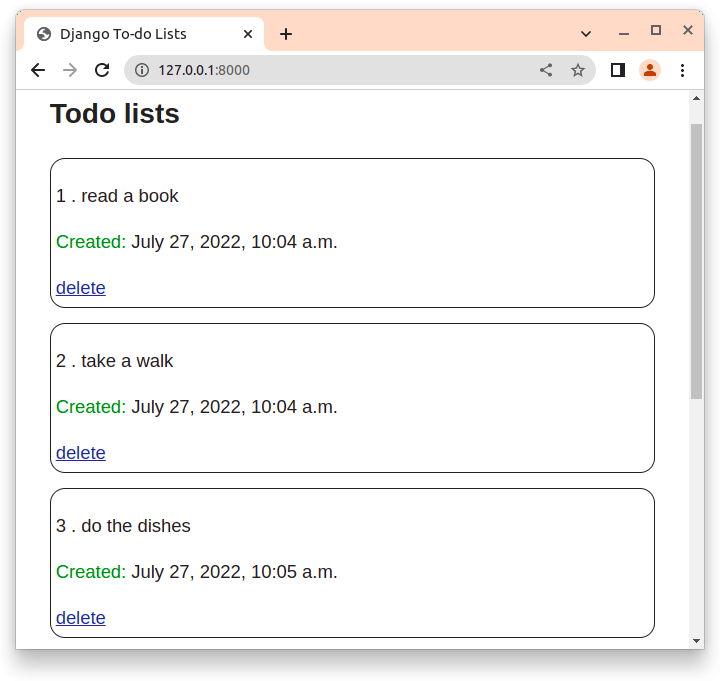 Clicking the delete button will delete the task listed.
Congrats. You have successfully created a to-do list.
Conclusion You've come a long way, from installing Django to building a Django application. To recap, you've learned how to:
- Create a virtual environment
- Create new data using the Django admin interface
- Structure data models
- Use function-based views
- Create URL configurations.
- Use templates to display your lists